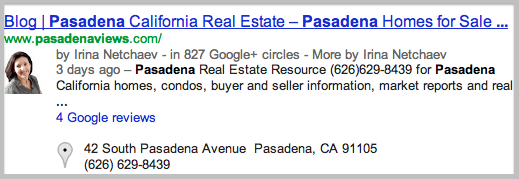
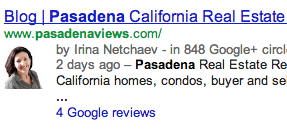
When you perform a search on Google for something, and you see a bunch of results, then one that has a profile image, which link are you most likely to click?
No doubt, the one with the profile image stands out.
So, in today’s post, I thought we’d talk about how to add Google Author tags on your real estate blog for improved search results.
You with me?
Why Google Authorship Matters:
The rel=”author” link element is a way of assigning authorship to the content you’ve published online. This way, when people perform a search, they’ll be able to see who published an entry straight from the search results page.
Here’s why this matters:
- They’ll be able to see your profile picture as the author of an article.
- They’ll be able to see how many other people are following you on Google+.
- They’ll be able to see how many other articles you’ve written. And,
- You’ll experience a (potential) increase in click-through rate.
How To Get Google’s Verified Authorship On Your WordPress Blog
Step #1. Setup your Google+ Profile.
Google gets the image for authorship from your Google+ profile. So if you haven’t created an account and setup your profile, you’ll want to. Once you have your profile setup, you want to make sure you’ve uploaded a high quality photo for your profile image.
Here’s an example from real estate broker, Irina Netchaev and her Google+ profile:

As you’re editing your Google+ profile, you’ll notice a section that reads “Contributor To” just below your “Other Profiles.” Here, you’ll want to be sure to add the name and URL of your blog. Simply click on the link to add a custom link and fill in the label and URL fields accordingly.
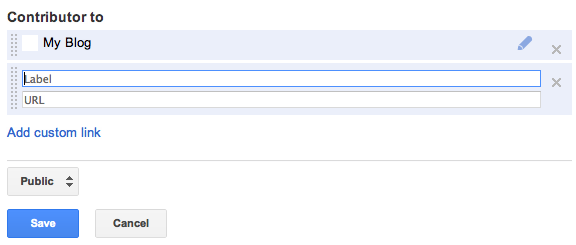
I added the URL to my About page on my blog that has the rel=”author” link element in it (see step #2 and #3).
Step #2. Create an Author page on your blog.
Here, I simply added the rel=”me” link element to the About page for my blog. The link URL should look like this:
<a href=”https//plus.google.com/111907191752989782692/posts” rel=”me”>Google+</a>
Step #3. Link to your Author page.
Your new Author page (in this case, the About page) needs to be linked to with the rel=”author” attribute in order to verify/prove authority to the content on the site.
If you’re using Custom Menu’s on your WordPress blog like I am, simply perform the following steps:
- Go to your Custom Menu’s dashboard > make sure the Link Relationship (XFN) option is selected under the Screen Options menu in the upper right-hand side of the screen.
- When you add/edit a custom menu link, you’ll see a Link Relationship (XFN) box. There, you’ll want to insert the word: Author. (As shown below)
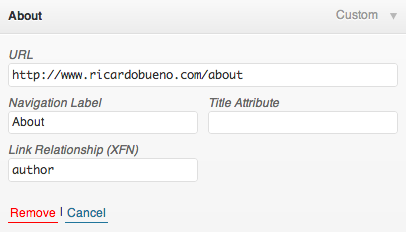
Step #4. Confirm you’ve completed all of your steps correctly.
Give it a few days before Google re-index’s your Author page. Once it does, you should start to see your profile show up in search results.
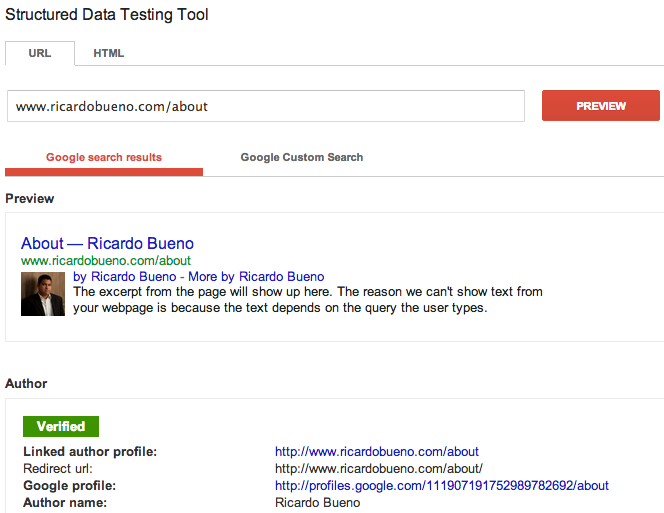
You can use the Rich Snippets Testing Tool from Google to see if you’ve set everything up properly. Simply submit your URL, and you’ll see a report that looks like this:
Alternative Methods:
- Using Yoast’s WordPress SEO plugin.
- Google+ rel=”Author” is coming in Genesis version 1.9.
Thanks to Brian Gardner for letting me use the steps outlined in his original tutorial for this post.

I must not be using custom menus because I don’t have a Link Relationship (XFN) box. Any recommendations on what to do from here?
Hey Clay, good talking to you. Glad we got this sorted out.
(Just had to check the Link Relationship (XFN) box under Screen Options).
Thanks for sharing this post as it answers a number of questions that I have had on this topic. I have seen this work on some of my posts but not all of them. Is there a reason?
Thanks Ricardo. Solid write up, Ive been trying to get this set up for a few weeks now. Good stuff